Liberated Churn Dash Tutorial
>> Wednesday, October 27, 2010
I designed a liberated Churn Dash block that I'm using as the block for my Sew Modern Bee quilt. This is a tutorial explaining the steps I took to make my block.
UPDATE JULY 2012
QUILT PATTERN AVAILABLE! A pattern for the quilt I made using my Bee Blocks. The tutorial information has been revised and improved with more detailed photos.The pattern includes instructions on how to quilt the individual panels and then join them together to create this queen size quilt.
This block measures 15.5 inches square unfinished. {I'm making 5 of the giant one in the back - they finish at 30 inches square} My bee mates will find a piece of white background in their fabric packages - roughly 18 inches square. It's good to start with a bigger background piece and trim to size at the end. This way you don't have to worry about the degree of your angles making your block finish smaller than your desired size.
The block is made up of 9 squares in a grid of 3 across and 3 down. The trick to liberated piecing is to think of cutting as drawing. Use the edge of your ruler to make straight lines, but not measured lines. Ignore the numbers. Place your ruler on a bit of an angle (or more of an angle if you want) and have fun!
Read through the tutorial and follow along with the pictures before you make your first cut. Please leave a comment if you have any questions.
Lay your background fabric down on your cutting mat.
Use your ruler's straight edge to cut the first vertical line down the left side of the fabric.
Cut a horizontal line across the top portion of the block,
roughly a third of the way down.
Again, this can be made on an angle.
roughly a third of the way down.
Again, this can be made on an angle.
Remove the centre piece and set aside. You will not be cutting it again.
The rest of the pieces require one more cut each before you can begin adding fabrics.
Cut each CORNER piece once on the diagonal.
The angles do not have to be through the corners.
The angles do not have to be through the corners.
Cut each MIDDLE piece once in half through the short side.
See the photo above.
See the photo above.
If you don't have one, try to leave them spread out or
take a digital picture so you know where the pieces go if they get moved.
take a digital picture so you know where the pieces go if they get moved.
I put a pin through the outside piece of each block -
this part is the background piece and stays white.
This also helps when working on the block
to keep the right side up
for sewing the sections back together.
This also helps when working on the block
to keep the right side up
for sewing the sections back together.
Now the fun begins!
Using the fabrics provided,
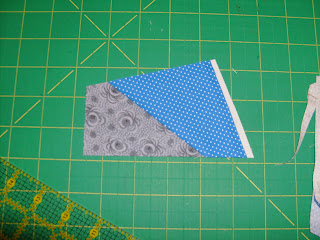
sew pieces together on top of the inner white pieces to create the churn dash.
Using the fabrics provided,
sew pieces together on top of the inner white pieces to create the churn dash.
If you've never done a foundation piecing technique, here's my very rough guide!
- Have your white foundation facing right side up.
- Place your first fabric choice, right side up on top of it - usually you will be starting at one end of the foundation and working across.
- Place your second fabric, right side down with the edges being sewn together on top of each other.
- Sew your seam.
- Flip your second fabric over to its right side and press.
- Continue covering the foundation by adding your next fabric, right side down, on top of the last fabric you added.
Confused? Try it once and see.
It makes more sense when you are doing it:)
It makes more sense when you are doing it:)
BEE MATES: The only *rule* in this section is to use AT LEAST 10 of the fabrics I sent you. And not to add any others - my husband picked out the colour palette and I promised not to add orange (or anything else!) no matter what:)
You can use thinner strips than what I provided.
You can put them in any direction, any combination. Enjoy!
 Once your foundation is covered,
turn the piece over and use the foundation as a guide
for trimming off the excess fabric.
{this means you line up the edge of your ruler on top of the foundation
and cut along this line, removing any extra fabric}
 If you find after trimming that part of the foundation is still showing,
you have a couple of options.
If it is less than 1/4 inch, it's not a problem as it will get closed during sewing the seams together.
If it is greater than 1/4 inch, you will need to add more fabric, and trim again.
Now you need to put the pieces back together.
Place your covered foundation right side up.
Put the corresponding white piece right side down on top.
You may need to have the ends of the white piece extend beyond the edge of the foundation piece because of the angle.
Not to worry -
this is actually a good thing and leaves room for a seam allowance.
Sew together and press.
I found mine liked to press towards the white and that's okay.
 Once each piece is made, then join the blocks to each other in rows.
Then join the rows together,
pinning to make sure the seams nest together around the centre piece.

You can trim your block to 15.5 inches square. If your block is small (mine was 14.5 inches square) don't worry. I will add a thin white border to build it's size.
Thank you so much for helping me make this quilt!
~If you make a block from my tutorial, feel free to send me a photo.
Email it to the address in my profile.
use #liberatedchurndash in social media
With Joy,
Sarah Vee
P.S. I am so surprised to see so many quilters finding my tutorial!
Thank You!
I hope you are enjoying it and using it to make your very own Liberated Churn Dash Quilts.
THERE'S a NEW Liberated Churn in Town!
This one features a different construction method.
Make each section of churn from one fabric for quicker piecing.
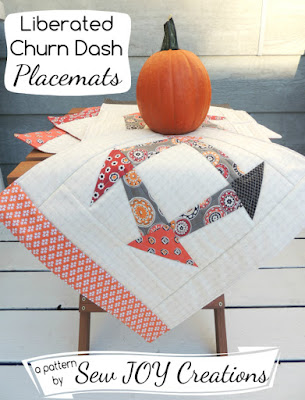
Created one of a kind placemats for gifts or to decorate your own table.
Liberated Churn Dash PLACEMATS pattern is now available - Enjoy :)
Sarah Vee


6 comments:
I am working on this block this weekend for my quilting bee. Thank you for posting the tutorial; this is truly a fun block to make!
Brilliant, Sarah! Thankyou for posting your tute, that goes into my "do this fun thing soon" file. Small blocks done this style would be great pillows or coasters.
And I love your husband's fabric choices : )
what a great tutorial. I never thought to foundation piece those pieces. Thankyou for sharing. :)
Awesome tutorial. The churn dash doesn´t look easy to make .this goes to my "to do list".Thanks for sharing your tutorial!!
Just saw this block on Pintrest, of course I saved it, and came to your site. I love it. Thanks for the tute and inspiration :)
Thank you, for This toturial 🙏This is my next project and i can't vait 😊
Post a Comment