A quick thank you to everyone who participated in the Quiltmaker's 100 Blocks Blog Tour giveaway! I've contacted my winners by email - Congratulations! :)
Christmas is coming and my birthday is almost here - again! This year I participated in a block exchange with some of my bestest quilting friends. You can read this post when my blocks first arrived to me back in February.
I decided to add this large panel block and frame it with my birthday blocks. I needed to add a border around the panel block so I could fit three scrappy bento box blocks down each side.
Only after all the math and cutting did I realize I needed to add more width too!
That's where the purple fabric comes in :)
Back to the design board. So here are the options I'm entertaining. This first photo shows the purple side borders on the outside. It will only go on the sides as I don't need to add any more length to the middle. I have a bit of the light print I'm adding as the first border, but not enough to cut wider borders - and I really don't want to add on a really skinny bit to make it wider. So.
Option 3 with the purple borders on the inside. This option makes it look like the purple was planned and that the light border is the right size. It doesn't give much visual separation between the side blocks and in this arrangement the scrappy blocks blend into the border. I would have to try turning my blocks to see if I could avoid the light sides of the blocks touching the border to please my eye.
Which option do you like better?
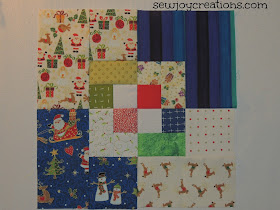
I'm supply teaching this week but did get the chance to cut some more stash and sew together two more scrappy bento box blocks. I'm using this tutorial.
Linking up with the Needle and Thread Network WIP Wednesday
With Joy,
Sarah V.


ReplyDeleteGood morning! I like the look of the purple right next to the block - it looks like it "belongs" there. This is going to be a great Christmas quilt!
Ohhhhh, purple definitely beside the stocking block!!
ReplyDelete