Backing Leftovers Challenge - Project Number One
>> Friday, July 27, 2018
There's nothing like that sense of relief followed by overwhelm when I finish making a quilt. Do you know what I mean? The accomplishment is quickly filled with the vacuum of time that now exists where that project ended. What to work on next?!
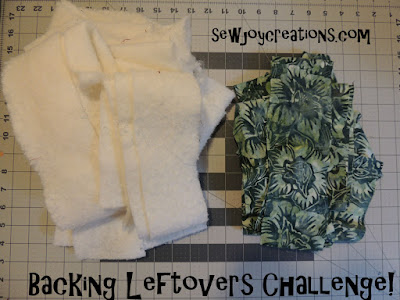
Some of that angst is also regret over the leftovers. The bits of fabric that weren't needed that will now be relegated to the scrap bin, larger pieces shoved back into the stash or maybe just left on the bottom of the UFO pile on the shelf. But, the backing leftovers that get cut off when trimming the quilt never had a home to begin with - their mission is complete, but there's so much usable STUFF there still! Isn't there?
Sometimes yes. Sometimes, you've had enough of the project and just want it all to go away. Other times the fabric you thought you would just "use up" grows on you after all that close physical contact and you want to savour it a bit longer. But how?
Herein lies my latest challenge! I love this backing fabric - a new Banyan batik from the Mary line that came out this June. I did a project for QUILTsocial with some of the other prints and just finished a quilt that you'll see much later.
Mary Batiks Cushion Cover
I decided I wanted to use some of it up and challenged myself to do it. I have a little window of time between projects - enough to keep me focused to complete some little things.
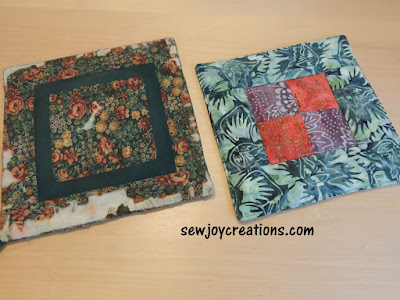
Here's my first one - a potholder.
Quick and easy. From the backing fabric I used two - 2 1/2" x 4 1/2" strips and two 2 1/2" x 8 1/2" strips. The four patch uses two 2 1/2" squares of two different colour fabrics.
You could do this with leftover binding strips too. Or just scraps.
- Make the four patch, then add the short strips to each side. Press the seams to the strips.
- Sew a long strip to the top and one to the bottom; press seams to the strips.
- Potholder top should measure 8 1/2" square.
The backing is from another fat quarter that I didn't use yet - I'm sure you have some extra fat quarters stacked somewhere too ;) Cut one 8 1/2" square.
I used two pieces of batting cut 8 1/2" square - leftovers from cutting the original batting to the quilt size. The batting from the quilt trimming will probably end up as stuffing in another project on my to-do list this summer.
- Place the two layers of batting on top of each other on your pinning surface.
- Put the backing piece RIGHT SIDE UP on top.
- Place potholder top RIGHT SIDE DOWN on top to finish the pile.
- Pin all the way around, leaving a 2" turning gap along one of the long strip sides.
- Sew all the way around, backstitching at beginning and end of turning gap.
- Clip corners, turn potholder right side out through turning gap.
- Finger press turning gap seam, then topstitch 1/8" around edge.
- I quilted in the seam around the four patch too.
A quick finish. And now I can finally replace a potholder that was a wedding gift 22 years ago! (hopefully mine will last as long!)
I'll be back with more backing leftovers challenge projects.
With Joy,
Sarah V.


2 comments:
If my quilt backing was for a baby quilt, the "leftovers" are sometimes large enough to make a bib or two. Longer strips from the sides could become a strap for a new purse or backpack. You could add a contrasting fabric strip to backing strips - cut into 14" lengths and sew them together - enough of those strips would make a placemat! (Our guild used to make placemats for Meals on Wheels to distribute at Christmas, Valentine's day, etc.) You could even use leftover batting for them - and get some Quilt As You Go practice!
Bibs are a great idea! Quilt as you go is a great one too. Thanks, Jannette :)
Post a Comment