Dropping In Sew Along ~ Welcome to Week 1
>> Tuesday, August 4, 2020
I'm sew glad you're here!
This is Week 1 for the Dropping In quilt pattern sew along.
Purchase the Dropping In pattern in my online shop
Paper pattern available through QuiltWoman.com
These posts will always be available so start when you're ready!
You can find a link to all of the posts in one spot - right here.
Let's get started!

This week is all about cutting your fabrics. I like to read through the quilt pattern and look at all the photos/diagrams before cutting. Why? Well, sometimes a photo tells you things you need to see to understand.
I look and think about
what is creating the design elements that I like
and
how I can make that happen with my fabrics?
Sometimes it's the fabric that makes the quilt!
In the Dropping In quilt pattern, the design moves down the quilt and repeats itself using two different blocks. I need contrast between my fabrics in the block as well as between the blocks to make the design move across the quilt.

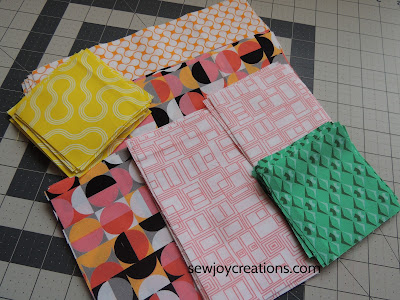
With the Good Vibes fabric, I chose to make one block in cool colours and one block in warm colours - mostly!
Cool colours are blue, green, and purple; warm colours are red, orange, and yellow.
This is a natural contrast and works well in this quilt.
Switching between light and dark fabrics is one way to make the design work - you could also play with prints and solids.
With the Good Vibes fabrics they are all prints, but half of the line features prints with dark backgrounds and half have light backgrounds, or read as what quilters refer to as neutrals. I alternated dark and light prints in my blocks and also varied the scale of the prints to keep them from blending into each other.
Directionality of the prints didn't really matter to me for most of the prints. This means that I just cut the fabric as listed in the pattern. I did purposely cut one fabric to make it's pattern go vertically(up and down the cut fabric) on the quilt and not horizontal(across the cut fabric) because of the overall movement of the quilt design down the quilt.

Can you see the one fabric has its pieces cut in what looks like opposite directions? Wait to see what they look like in the block next week ;)
KIT TIP:
I changed my mind about the placement of 2 fabrics once I saw them in real life.
This does not change the amounts of fabric required, just fabric placement.
I switched Fabrics C and G around - this means the fabrics will be placed in the opposite positions from my original version of the quilt.
I did this because the two green fabrics I chose don't look as good beside each other and I think the C and G fabrics look better beside the opposite fabrics.
The picture of the quilt now features the fabrics in their new spots :)
Week 1 To Dos

~Cut fabrics for the quilt top
You might want to wash and/or iron them first. I used to be a wash-everything-as-it-comes-into-my-sewing-room kind of quilter, but that was years ago! Now I iron before cutting and feel no anxiety about colorfastness or shrinkage. I use the best cotton fabrics I can afford.
Use the cutting instructions in the pattern to cut the pieces for the entire quilt top. This will make the rest of the sew along all about sewing! I even cut the binding strips and have them ready to sew together.
Remember to keep in mind the direction of your prints when cutting. You get to decide if you want to emphasize it or not - cut up directional prints create interest in a quilt when you are snuggled underneath it. If you are using the kit from Christa, you can cut your fabrics like I did or not. It's still your quilt :)
~Keep the cut fabrics organized
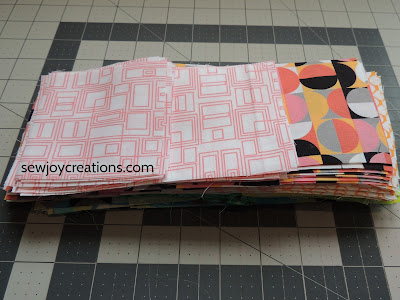
For this quilt it's pretty easy to keep the pieces organized but sometimes I will also add a label that says what the fabric is in my quilt, for example, Fabric A. I try to label the cut pieces in some way especially if I have to move them before working on the project. In this case, I am stacking mine in two piles - one for Block A and one for Block B. You can put your cut pieces in a container until next week if you're like me and making other things too!
~Share!
Join me in my facebook group where you can share photos of your fabrics. I'm also on instagram and using the hashtag #droppinginquilt to show my progress.
Enjoy cutting this week!
Sarah V.
Join my newsletter list to stay up to date with sew alongs, pattern releases and more. Plus you get to enjoy freebies that are only available to my newsletter subscribers. Click the image below to sign up!


0 comments:
Post a Comment